背景
在日常的项目开发中,往往会涉及到一些需要做到定时执行的代码,例如自动将超过24小时的未付款的单改为取消状态,自动将超过14天客户未签收的订单改为已签收状态等等,那么为了在Spring Boot中实现此类需求,我们要怎么做呢?
Spring Boot早已考虑到了这类情况,先来看看要怎么做。
第一种方式是比较简单的,基于@Scheduled注解
1
2
3
4
5
6
7
8
9
10
11
12
13
14
| @EnableCaching
@EnableScheduling
@ComponentScan(basePackages = "org.javamaster.b2c")
@EnableTransactionManagement
@SpringBootApplication
public class ScheduledApplication {
private static Logger logger = LoggerFactory.getLogger(ScheduledApplication.class);
public static void main(String[] args) {
SpringApplication.run(ScheduledApplication.class, args);
logger.info("定时任务页面管理地址:{}", "http://localhost:8089/scheduled/task/taskList");
}
}
|
编写定时任务类
1
2
3
4
5
6
7
8
9
10
11
| @Component
public class FixedPrintTask {
private Logger logger = LoggerFactory.getLogger(getClass());
private int i;
@Scheduled(cron = "*/15 * * * * ?")
public void execute() {
logger.info("thread id:{},FixedPrintTask execute times:{}", Thread.currentThread().getId(), ++i);
}
}
|
@Scheduled(cron =”*/15 * * * * ?”)注解表明这是一个需要定时执行的方法,里面的cron属性接收的是一个cron表达式,这里我给的是 */15 * * * * ? ,这个的意思是每隔15秒执行一次方法,对cron表达式不熟悉的同学可以百度一下用法。项目跑起来后可以看到方法被定时执行了:
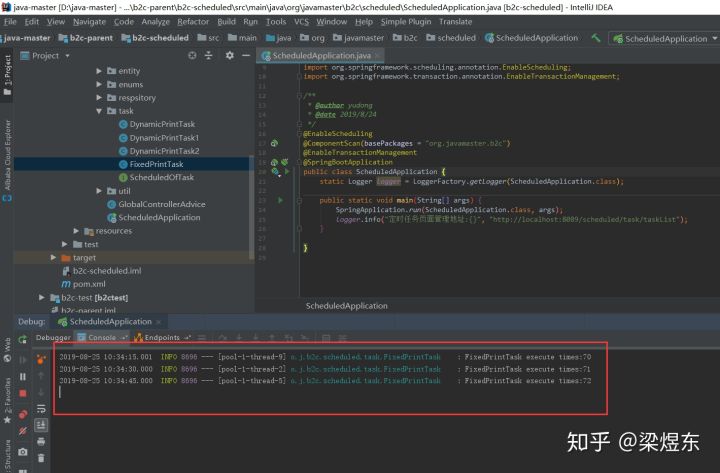
这种方式有个缺点,那就是执行周期写死在代码里了,没有办法动态改变,要想改变只能修改代码在重新部署启动微服务。其实Spring也考虑到了这个,所以给出了另外的解决方案,就是我下面说的第二种方式。
建立一个定时任务表并插入三条定时任务记录
1
2
3
4
5
6
7
8
9
10
11
12
13
14
15
16
17
18
19
20
21
22
23
24
| drop table if exists `spring_scheduled_cron`;
create table `spring_scheduled_cron` (
`cron_id` int primary key auto_increment
comment '主键id',
`cron_key` varchar(128) not null unique
comment '定时任务完整类名',
`cron_expression` varchar(20) not null
comment 'cron表达式',
`task_explain` varchar(50) not null default ''
comment '任务描述',
`status` tinyint not null default 1
comment '状态,1:正常;2:停用',
unique index cron_key_unique_idx(`cron_key`)
)
ENGINE = InnoDB
DEFAULT CHARSET = utf8mb4
COMMENT = '定时任务表';
insert into `spring_scheduled_cron`
values (1, 'org.javamaster.b2c.scheduled.task.DynamicPrintTask', '*/5 * * * * ?', '定时任务描述', 1);
insert into `spring_scheduled_cron`
values (2, 'org.javamaster.b2c.scheduled.task.DynamicPrintTask1', '*/5 * * * * ?', '定时任务描述1', 1);
insert into `spring_scheduled_cron`
values (3, 'org.javamaster.b2c.scheduled.task.DynamicPrintTask2', '*/5 * * * * ?', '定时任务描述2', 1);
|
编写一个配置类
1
2
3
4
5
6
7
8
9
10
11
12
13
14
15
16
17
18
19
20
21
22
23
24
25
26
27
28
29
30
31
32
33
34
| @Configuration
public class ScheduledConfig implements SchedulingConfigurer {
@Autowired
private ApplicationContext context;
@Autowired
private SpringScheduledCronRepository cronRepository;
@Override
public void configureTasks(ScheduledTaskRegistrar taskRegistrar) {
for (SpringScheduledCron springScheduledCron : cronRepository.findAll()) {
Class<?> clazz;
Object task;
try {
clazz = Class.forName(springScheduledCron.getCronKey());
task = context.getBean(clazz);
} catch (ClassNotFoundException e) {
throw new IllegalArgumentException("spring_scheduled_cron表数据" + springScheduledCron.getCronKey() + "有误", e);
} catch (BeansException e) {
throw new IllegalArgumentException(springScheduledCron.getCronKey() + "未纳入到spring管理", e);
}
Assert.isAssignable(ScheduledOfTask.class, task.getClass(), "定时任务类必须实现ScheduledOfTask接口");
taskRegistrar.addTriggerTask(((Runnable) task),
triggerContext -> {
String cronExpression = cronRepository.findByCronKey(springScheduledCron.getCronKey()).getCronExpression();
return new CronTrigger(cronExpression).nextExecutionTime(triggerContext);
}
);
}
}
@Bean
public Executor taskExecutor() {
return Executors.newScheduledThreadPool(10);
}
}
|
自定义了一个接口ScheduledOfTask
1
2
3
4
5
6
7
8
9
10
11
12
13
14
15
16
17
18
19
| public interface ScheduledOfTask extends Runnable {
void execute();
@Override
default void run() {
SpringScheduledCronRepository repository = SpringUtils.getBean(SpringScheduledCronRepository.class);
SpringScheduledCron scheduledCron = repository.findByCronKey(this.getClass().getName());
if (StatusEnum.DISABLED.getCode().equals(scheduledCron.getStatus())) {
return;
}
execute();
}
}
|
所有定时任务类只需要实现这个接口并相应的在数据库插入一条记录,那么在微服务启动的时候,就会被自动注册到Spring的定时任务里,也就是这行代码所起的作用:
1
2
3
4
5
6
7
|
taskRegistrar.addTriggerTask(((Runnable) task),
triggerContext -> {
String cronExpression = cronRepository.findByCronKey(springScheduledCron.getCronKey()).getCronExpression();
return new CronTrigger(cronExpression).nextExecutionTime(triggerContext);
}
);
|
具体的定时任务类(一共有三个,这里我只列出一个):
1
2
3
4
5
6
7
8
9
10
| @Component
public class DynamicPrintTask implements ScheduledOfTask {
private Logger logger = LoggerFactory.getLogger(getClass());
private int i;
@Override
public void execute() {
logger.info("thread id:{},DynamicPrintTask execute times:{}", Thread.currentThread().getId(), ++i);
}
}
|
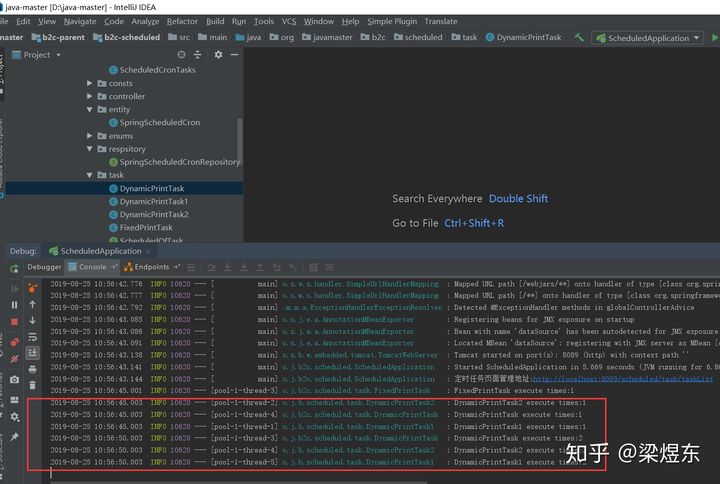
项目跑起来后,可以看到类被定时执行了
提供一个Controller类动态改变数据库数据
1
2
3
4
5
6
7
8
9
10
11
12
13
14
15
16
17
18
19
20
21
22
23
24
25
26
27
28
29
30
31
32
33
34
35
36
37
38
39
40
41
42
43
44
45
46
| @Controller
@RequestMapping("/scheduled/task")
public class TaskController {
@Autowired
private ApplicationContext context;
@Autowired
private SpringScheduledCronRepository cronRepository;
@RequestMapping("/taskList")
public String taskList(Model model) {
model.addAttribute("cronList", cronRepository.findAll());
return "task-list";
}
@ResponseBody
@RequestMapping("/editTaskCron")
public Result<Void> editTaskCron(String cronKey, String newCron) {
if (!CronUtils.isValidExpression(newCron)) {
throw new IllegalArgumentException("失败,非法表达式:" + newCron);
}
cronRepository.updateCronExpressionByCronKey(newCron, cronKey);
return new Result<>(AppConsts.SUCCESS, "更新成功");
}
@ResponseBody
@RequestMapping("/runTaskCron")
public Result<Void> runTaskCron(String cronKey) throws Exception {
((ScheduledOfTask) context.getBean(Class.forName(cronKey))).execute();
return new Result<>(AppConsts.SUCCESS, "执行成功");
}
@ResponseBody
@RequestMapping("/changeStatusTaskCron")
public Result<Void> changeStatusTaskCron(Integer status, String cronKey) {
cronRepository.updateStatusByCronKey(status, cronKey);
return new Result<>(AppConsts.SUCCESS, "操作成功");
}
}
|
这里我为了方便调用Controller接口,使用thymeleaf技术写了一个简易的html管理页面:
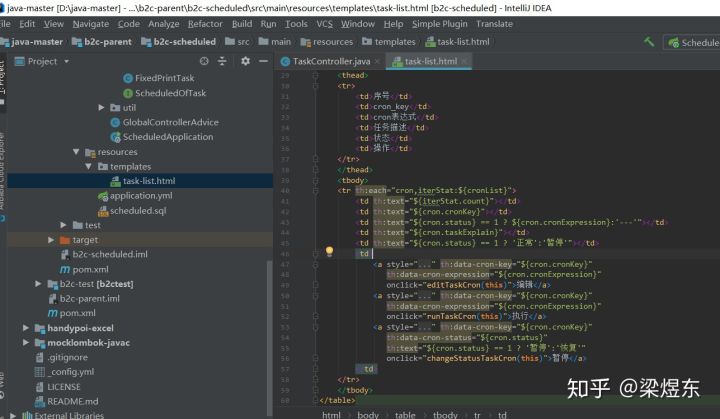
网页效果是这样的:

可以做到查看任务列表,修改任务cron表达式(也就实现了动态改变定时任务执行周期),暂停定时任务,以及直接执行定时任务。
最后如果对定时任务有更多其它要求,可以考虑使用xxljob这个开源的分布式任务调度平台,有兴趣的同学可以去了解,这里我就不展开了。
作者简介
bug绝缘体